Painting Contractors Orlando FL

June 2026

Newly painted new construction home exterior in Orlando

New Construction Painting in Orlando: What to Expect

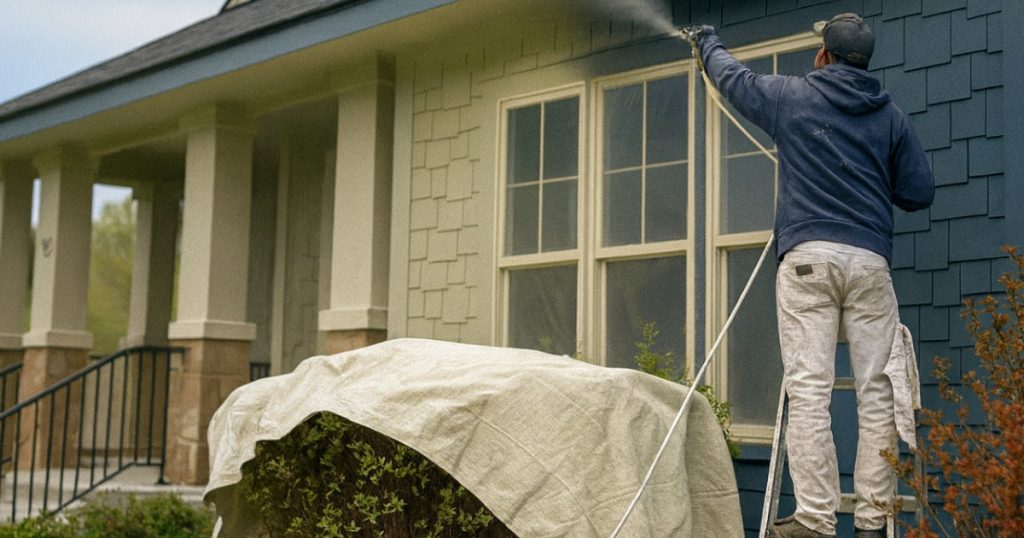
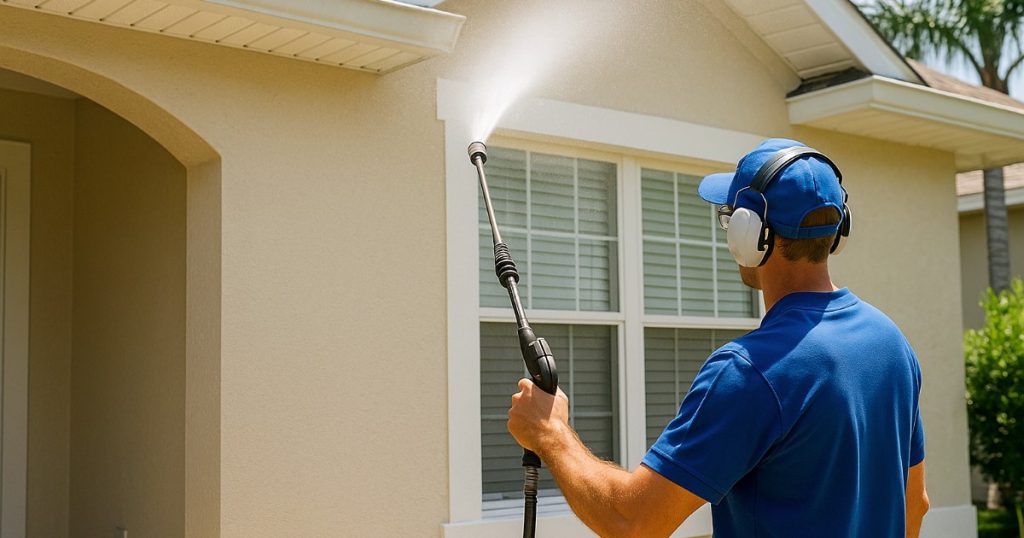
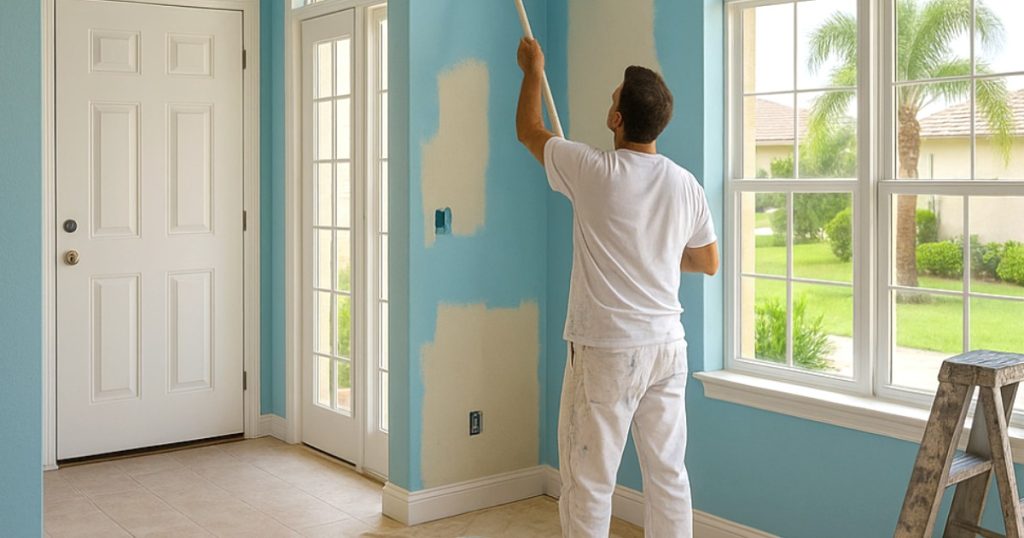
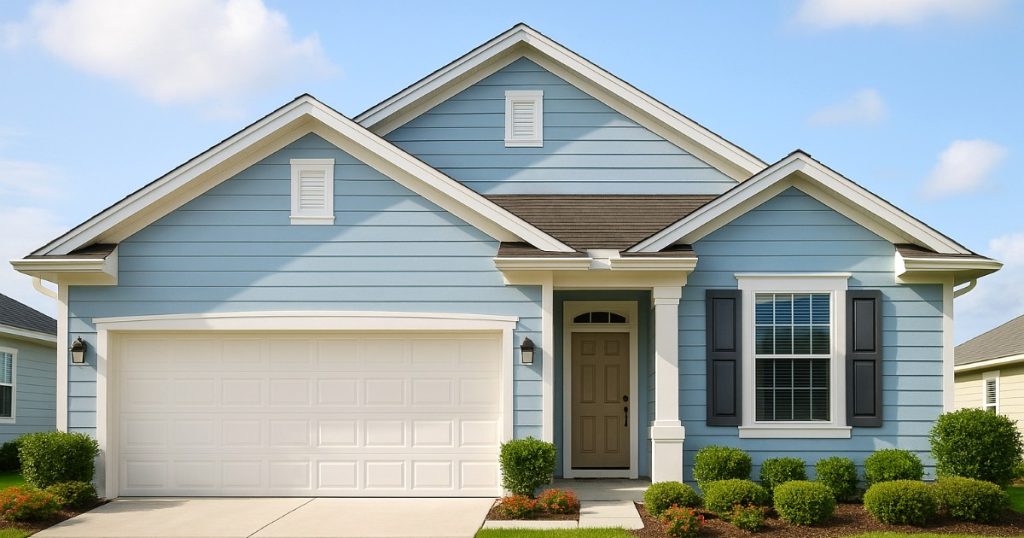
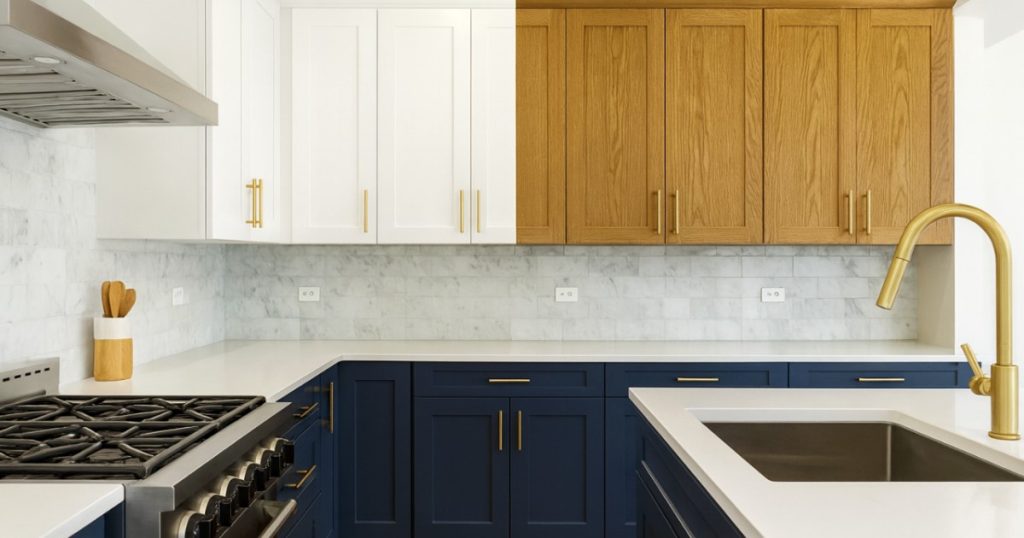
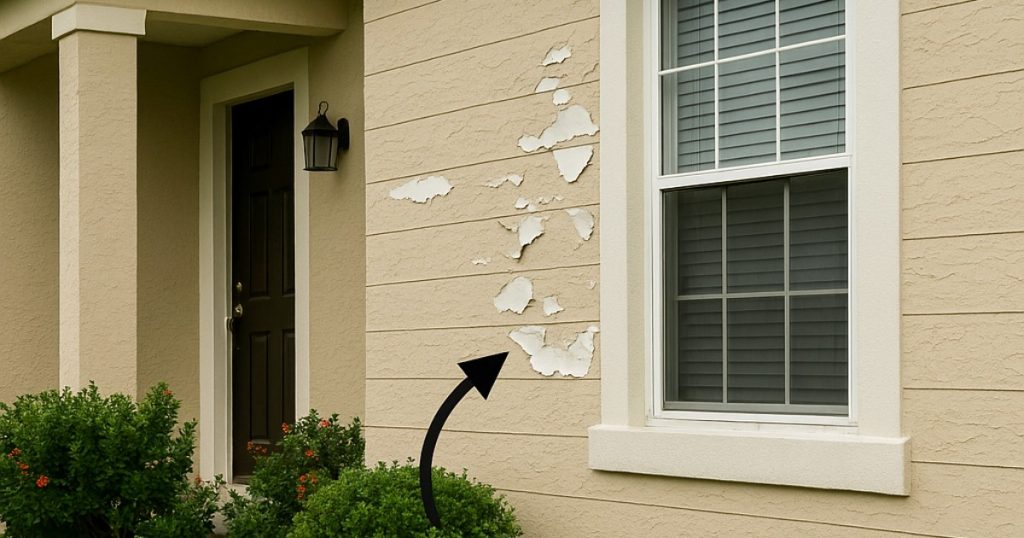
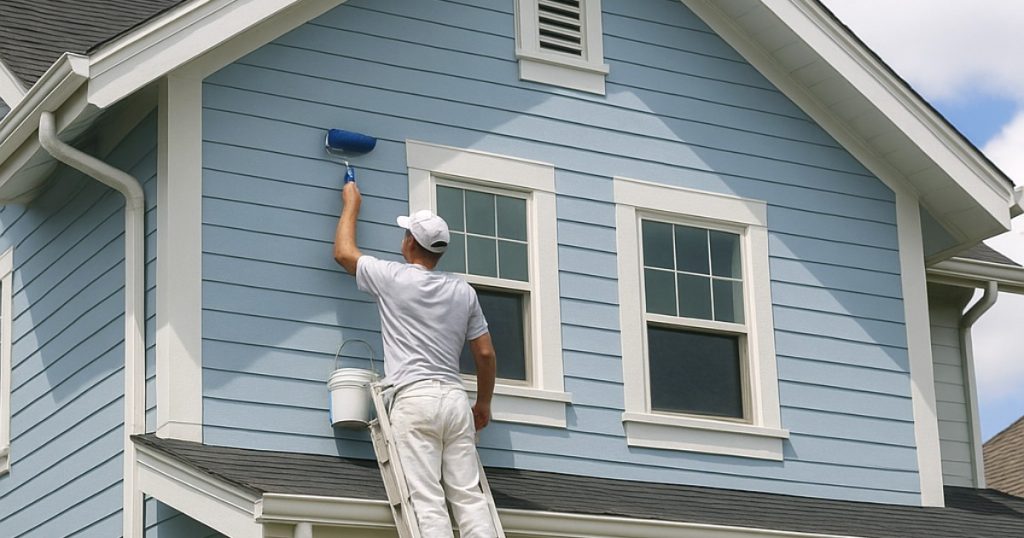
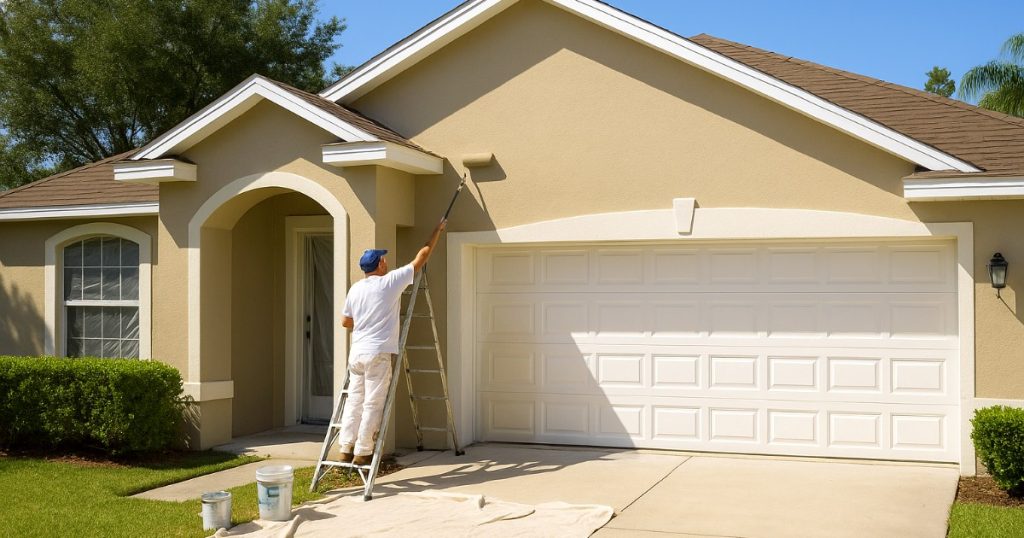
Orlando continues to grow, and new homes are going up across Lake Nona, Horizon West, Winter Garden, and the surrounding communities. Painting a brand-new home is different from repainting an existing one. The surfaces are raw, the timing has to align with other trades, and the quality of that first coat sets the tone for years. Whether you are a builder coordinating a project or a buyer moving into a new build, here is what to expect from new construction painting in Orlando. New Construction Painting Is Its Own Discipline On a repaint, much of the work is prep and cleaning. On new construction, the challenge is preparing raw, never-painted surfaces and sequencing the work correctly with framing, drywall, trim, and flooring. Fresh drywall, new wood trim, and bare stucco all behave differently than aged surfaces, and each needs the right priming and approach. Getting this first finish right is what gives a new home its clean, crisp look and protects it from day one. Priming Is Not Optional on New Surfaces This is the step that matters most on a new build. New drywall is porous and soaks up paint unevenly, and the seams and joint compound absorb differently than the paper face of the board. Without a proper primer, the finish coat looks blotchy and uneven. New drywall should receive a quality primer or sealer before any color goes on, which creates a uniform surface and helps the topcoat cover properly. Bare wood trim and doors need priming too, to seal the grain and prevent tannin bleed. Bare stucco requires a masonry primer for the same reasons. The Typical New Construction Painting Sequence 1. Interior Prep and Priming Once drywall is hung, finished, and sanded, the interior is primed. Any imperfections that show up under primer are addressed before moving on. Coordinating with the drywall crew matters here, and any needed drywall repair or finishing is handled before priming. 2. Spraying Ceilings and Walls In new construction, walls and ceilings are often sprayed before flooring, cabinets, and fixtures go in. Spraying an empty house is faster and produces an even, professional finish. This is one of the big advantages of painting during the build rather than after. 3. Trim, Doors, and Detail Work Trim, baseboards, doors, and other millwork are primed and painted, usually in a more durable semi-gloss or satin that holds up to handling. Coordinating with the trim carpenters keeps the timeline smooth. 4. Exterior Painting Exterior work on stucco, fiber cement, or siding is timed so the surfaces have properly cured. Painting stucco too soon, before it has cured, is a common new-construction mistake that leads to problems later. Proper products built for our climate are essential, as we explain in our guide to paint that lasts longest in Florida’s humid climate. 5. Final Touch-Ups After other trades finish and the home is cleaned, a final walkthrough catches nicks and marks created during installation of floors, cabinets, and fixtures. Touch-ups leave the home move-in ready. What Builders Should Expect For builders, the priorities are reliable scheduling, clean coordination with other trades, and consistent quality across a community. A painting contractor who shows up on time, keeps pace with the build, and delivers a uniform finish protects your schedule and your reputation with buyers. Consistency across multiple homes also matters, so buyers in the same community get the same quality finish. We work as a dependable partner on new construction throughout the Orlando area, including communities like Lake Nona and Winter Garden. What Buyers Should Expect If you are buying a new home, understand that builder-grade paint is often a basic, flat product applied in a single standard color. It looks clean at move-in, but flat paint scuffs easily and can be hard to clean. Many new homeowners choose to upgrade to a more durable finish or add accent colors shortly after moving in. Doing this before you move furniture in is far easier than later. For color ideas, see our guide to the best paint colors for Orlando homes, and for sheen choices, our post on eggshell, satin, and semi-gloss. Common New Construction Painting Mistakes to Avoid Skipping or skimping on primer over new drywall, which causes a blotchy finish Painting stucco before it has fully cured Using the cheapest possible paint, which fails faster in our sun and humidity Poor coordination with other trades, leading to damaged finishes and delays Rushing the final touch-up stage and leaving visible marks at move-in Work With an Experienced Orlando Painting Contractor New construction rewards experience, coordination, and attention to detail. Whether you are a builder who needs a dependable crew or a buyer who wants to upgrade a new home’s finish, we can help. We have served the greater Orlando area since 2018 and are licensed, insured, and bonded. Explore our full range of painting services or call (321) 233-2923 for a free estimate and project consultation.

New Construction Painting in Orlando: What to Expect Read More »

Freshly painted interior of an Orlando rental property

Painting a Rental Property in Orlando: What Landlords Need to Know

Orlando is one of the strongest rental markets in the country, and painting is one of the most cost-effective ways landlords keep units rentable and protect their investment. But painting a rental is a different job than painting your own home. The priorities shift toward durability, speed, cost control, and turnover. Here is what Orlando landlords and property managers need to know to get it right. Why Paint Is a Landlord’s Best Friend Few improvements deliver more value per dollar in a rental than fresh paint. It makes a unit show better in photos and walkthroughs, helps justify market rent, reduces vacancy time, and protects walls from the wear that tenants inevitably create. Between tenants, a quick repaint can erase a year of scuffs and make a unit feel new again. Over the long run, regular painting also protects the property itself, which we explain in our article on how professional painting increases long-term value. Choose Durable, Washable Finishes The biggest mistake landlords make is using flat, builder-grade paint to save money up front. Flat paint scuffs easily and cannot be cleaned, which means full repaints at every turnover. Instead, choose a quality washable finish. Eggshell and satin sheens are the sweet spot for rentals because they resist marks, wipe clean, and still look good. For trim, doors, and high-touch areas, semi-gloss stands up to repeated cleaning. Our guide to choosing between eggshell, satin, and semi-gloss breaks down where each one belongs. Stick to Neutral, Repeatable Colors Neutral colors are a landlord’s best strategy for several reasons. They appeal to the widest range of tenants, photograph well, and make a space feel larger and cleaner. Just as important, using one or two standard colors across your units lets you keep paint on hand and do fast, seamless touch-ups without repainting entire walls. Warm whites, soft greiges, and light gray tones are the most practical choices. For ideas, see our overview of the best paint colors for Orlando homes. Standardize Across Your Portfolio If you own or manage multiple units, consistency saves real money. Document the exact paint brand, color, and sheen used in each unit. When a tenant moves out, your painter can match it instantly, and touch-ups blend perfectly. This single habit can turn a full repaint into a quick freshen-up and shave days off every turnover. Time Painting Around Turnovers The window between tenants is the ideal time to paint, since the unit is empty and accessible. Fast turnaround matters here because every vacant day is lost rent. Professional crews can prep and paint a typical unit quickly and reliably, which is hard to match with a DIY weekend or an unreliable handyman. Coordinating painting alongside cleaning and any needed drywall repair keeps the whole turnover on schedule. Do Not Skip Prep, Even on Rentals It is tempting to cut prep to save time, but in Florida that backfires. Tenant walls collect grease, smoke, and grime, and humidity invites mildew, especially in bathrooms and kitchens. Painting over these without cleaning and proper prep leads to peeling and callbacks. Address moisture issues, patch holes, and clean surfaces first. If you keep seeing the same issues unit to unit, our guide to common Orlando paint problems can help you get ahead of them. Know the Rules on Wear and Tear Florida landlords generally cannot deduct the cost of normal repainting from a security deposit when the wear is ordinary. Routine fading and minor scuffing from normal living are considered standard wear and tear. Damage that goes beyond that, such as unauthorized colors, large holes, or significant marks, may be chargeable. Keeping good move-in and move-out documentation, including dated photos, protects you either way. When in doubt, treat repainting as a standard cost of maintaining the property rather than a tenant charge. Budget Painting as a Recurring Cost Smart landlords build painting into their operating budget rather than treating it as a surprise. Interior repaints in a rental are typically needed every few years, sooner in high-turnover units. Because you are often touching up rather than fully repainting, costs can be kept reasonable with the standardization steps above. For a sense of pricing, our guide to interior versus exterior painting costs is a helpful reference. Partner With a Painter Who Understands Rentals Working with painters who understand turnover speed, color matching, and durable finishes makes managing rentals far easier. We work with Orlando landlords and property managers on single units and full portfolios, and we have served the area since 2018 as a licensed, insured, and bonded contractor. Explore our interior painting services or call (321) 233-2923 to set up reliable, repeatable painting for your rentals.

Painting a Rental Property in Orlando: What Landlords Need to Know Read More »

Pressure washing an Orlando home exterior before painting

Pressure Washing Before Painting: Why It Matters in Florida

It is tempting to think of pressure washing as an optional extra before a paint job. In Florida, it is anything but. Our climate coats every exterior surface with mildew, algae, pollen, and grime, and paint simply will not bond to a dirty wall. Skipping the wash is one of the fastest ways to end up with peeling, premature paint failure. Here is why pressure washing matters so much before painting in Florida, and what a proper wash involves. Paint Does Not Stick to a Dirty Surface This is the core reason. Paint forms its bond with the surface it is applied to. When that surface is covered in a thin film of mildew, dust, chalking paint, or pollen, the new paint adheres to the dirt instead of the wall. Over the following months, that weak bond gives way, and the paint begins to peel, flake, or bubble. A clean, sound surface is the foundation of every long-lasting paint job, and in Florida that almost always requires pressure washing first. The Florida Factors That Make Washing Essential Mildew, Mold, and Algae Our heat and humidity create ideal conditions for mildew and algae, which grow on exterior walls year round. You may see it as dark streaks, green tint, or black speckling. Painting over mildew does not kill it. It keeps growing under the new paint and pushes it off the wall. A proper wash removes the existing growth so the surface is clean before paint goes on. Pollen Central Florida pollen season blankets homes in a fine yellow layer every spring. That powder works its way into every texture and crevice of your siding and stucco. Unless it is washed away, it sits between your wall and your new paint, undermining adhesion. Salt and Coastal Air Homes closer to the coast collect airborne salt, which builds up on exterior surfaces. Salt residue interferes with paint bonding and needs to be rinsed off as part of prep. Chalking and Old Paint Residue As exterior paint ages in our sun, it breaks down into a powdery, chalky residue. Run your hand along an older wall and you will often see it come away on your palm. That chalk must be washed off, or the new coat has nothing solid to grip. What a Proper Pre-Paint Wash Involves Effective pressure washing before painting is more than blasting the wall with water. Done correctly, it includes: Using the right pressure for the surface, since stucco, wood, and vinyl each tolerate different levels Applying a cleaning solution that kills mildew and algae rather than just rinsing the surface of it Working methodically so no areas are missed Directing water at the correct angle to avoid driving moisture behind siding Allowing the surface to dry fully before any paint is applied That last point is critical in our climate. Painting over a damp surface traps moisture and causes the same peeling and blistering you were trying to avoid. Professionals know how long to wait given the day’s humidity. The Risks of Doing It Wrong Too much pressure can gouge wood, crack stucco, strip caulk, and force water into your walls. Too little, or skipping the cleaning solution, leaves mildew alive on the surface. Getting it wrong can create more problems than skipping the wash entirely. This is one of the main reasons exterior painting is best left to professionals who understand the right technique for each surface. For more on avoiding common failures, see our guide to fixing common Orlando home paint problems. How Washing Fits Into the Whole Job Pressure washing is the first step in proper exterior prep, but it works alongside other steps like sealing stucco cracks, recaulking, and priming bare spots. Together, this prep is what makes premium paint perform for years rather than months. It also pairs with smart product selection, which we cover in our post on the paint that lasts longest in Florida’s humid climate. You can also dive deeper into the specifics in our detailed guide on pressure washing before painting in Orlando. Start Your Exterior Project the Right Way A great exterior paint job in Florida starts with a clean surface. We include proper pressure washing and surface prep as a standard part of our exterior work, because we know it is what makes the finished result last. We have served the greater Orlando area since 2018 and are licensed, insured, and bonded. Learn more about our exterior house painting services or call (321) 233-2923 for a free estimate.

Pressure Washing Before Painting: Why It Matters in Florida Read More »

Smooth, freshly finished interior ceiling after popcorn ceiling removal in an Orlando home

Popcorn Ceiling Removal in Orlando: Cost and Process

Popcorn ceilings were standard in Florida homes for decades, and many Orlando houses still have them. They hide imperfections and once helped with sound, but today most homeowners find them dated, hard to clean, and a magnet for dust. Removing them is one of the most popular updates we are asked about. Here is what popcorn ceiling removal in Orlando actually costs, how the process works, and what you should expect before you start. What Popcorn Ceiling Removal Costs in Orlando Most popcorn ceiling removal jobs in Orlando cost between $1.25 and $6 per square foot. For a typical project, homeowners spend somewhere between $900 and $2,800, with the average landing around $1,800. The range depends on the size of the area, the height of your ceilings, whether the ceiling was painted, and how much repair and refinishing is needed after the texture comes off. Painted popcorn ceilings cost more to remove because the paint seals the texture and makes it harder to scrape. Higher ceilings and detailed rooms also add labor. Remember that removal is only half the job. After the texture is gone, the ceiling needs to be skim-coated, sanded, primed, and painted to look finished, and that refinishing is part of the total cost. The Asbestos Concern in Older Homes This is the single most important thing to understand before scraping anything. Popcorn ceilings installed before the 1980s may contain asbestos, which was a common ingredient in ceiling texture at the time. Florida grew rapidly during the decades when asbestos was widely used, so this is a real consideration for older Orlando homes. If your home was built before the mid-1980s, do not scrape or disturb the ceiling until it has been tested by a licensed professional. Asbestos testing typically costs between $250 and $850. If asbestos is present, removal must be handled by a licensed abatement contractor, and that work runs roughly $4 to $6 per square foot. Disturbing asbestos yourself is a serious health hazard and is not worth the risk. Testing first is always the right move on an older home. The Removal Process Step by Step 1. Test and Prepare the Room After any needed asbestos testing clears, the room is emptied and everything is protected. Floors, any remaining furniture, walls, and fixtures get covered with plastic sheeting, because this is a messy job. Power to ceiling fixtures is turned off and outlets are protected from moisture. 2. Wet the Ceiling Unpainted popcorn texture is misted with water and allowed to soak. Wetting softens the texture so it scrapes off cleanly and keeps dust down. Painted ceilings may resist water and require extra effort or a different approach. 3. Scrape Off the Texture The softened texture is scraped away with a wide putty knife or specialized scraper, working in sections. Care is taken not to gouge the drywall underneath, which would create extra repair work. 4. Repair and Skim Coat Once the texture is off, the bare ceiling almost always needs attention. Scrape marks, old seams, and imperfections are patched and then skim-coated with joint compound to create a smooth, flat surface. This step is what separates a professional result from a rough one. Any needed drywall repair happens here. 5. Sand, Prime, and Paint The smoothed ceiling is sanded, primed, and painted, usually with a ceiling-specific flat paint. The result is a clean, modern, flat ceiling that makes the whole room feel taller and brighter. Should You Remove or Cover It? Scraping is the most common approach, but it is not the only one. In some cases, especially where asbestos is present and intact, covering the ceiling with new drywall over the existing texture can be a safer and cleaner option. A professional can advise which path makes sense for your specific ceiling, budget, and home age. Why Hire a Professional Popcorn removal looks simple on video, but it is dusty, physically demanding, and easy to get wrong. Gouged drywall, uneven skim coats, and visible seams are common DIY results that end up costing more to fix. On older homes, the asbestos risk alone is reason enough to bring in a pro. A professional crew contains the mess, repairs the ceiling properly, and leaves you with a smooth, paint-ready finish. The transformation also adds to your home, as we discuss in our article on how professional painting increases long-term value. Get a Free Popcorn Ceiling Estimate in Orlando If you are ready to modernize your ceilings, we can walk you through testing, removal, and refinishing from start to finish. We have served the greater Orlando area since 2018 and are licensed, insured, and bonded. Browse our full painting and finishing services or call (321) 233-2923 for a free, no-pressure estimate.

Popcorn Ceiling Removal in Orlando: Cost and Process Read More »

Smooth, freshly finished interior ceiling after popcorn ceiling removal in an Orlando home

10 Signs It’s Time to Repaint Your Orlando Home’s Interior

Interior paint does more than set the mood of a room. It protects your walls, resists everyday wear, and keeps your Orlando home feeling fresh. But interior paint does not last forever, and in our humid climate it can show its age sooner than you might expect. If you are not sure whether it is time for a refresh, here are ten clear signs that your home’s interior is due for a new coat. 1. Visible Fading If your walls look duller than they used to, or you spot a brighter rectangle where a picture frame used to hang, the paint has faded. Sunlight streaming through Florida windows fades interior color over time, especially in rooms that get strong afternoon light. Faded walls are one of the most common reasons homeowners call us. 2. Scuffs, Marks, and Stains That Will Not Clean Hallways, stairwells, and kids’ rooms collect scuffs and handprints. When washing no longer removes the marks, or when cleaning starts to rub off the paint itself, the finish has worn through. A fresh coat restores a clean, uniform look instantly. 3. Cracking, Flaking, or Peeling Paint that is cracking or peeling away from the wall is past its service life. In bathrooms, kitchens, and laundry rooms, this often points to moisture, which is common in Florida homes. Peeling should be addressed promptly before it spreads or hides a bigger issue underneath. 4. Mildew or Dark Spots Dark speckles or streaks, particularly in bathrooms and other humid areas, usually mean mildew. Our climate makes this a frequent problem indoors. Repainting with a mildew-resistant product, after proper cleaning and prep, helps keep it from coming back. If you are seeing recurring paint problems, our guide to fixing common Orlando home paint problems is a useful read. 5. Nail Holes, Dents, and Patch Marks Walls accumulate damage over the years from furniture, hanging art, and daily life. When your walls are dotted with filled holes, touch-ups that do not match, or visible patches, a full repaint gives you a clean slate. This is also the ideal time to handle any needed drywall repair so the finished result is smooth. 6. Touch-Ups No Longer Match When you touch up a spot and the new paint stands out as a slightly different shade or sheen, it is a sign the original paint has aged and faded. Once touch-ups stop blending, repainting the whole wall or room is the only way to get a uniform finish. 7. Your Colors Feel Dated Color trends move, and a palette that looked current a decade ago can make an entire home feel older than it is. If your interior feels tired or stuck in another era, new color is the fastest and most affordable way to modernize. For inspiration, see our overview of the best paint colors for Orlando homes. 8. You Are Preparing to Sell Few improvements deliver a better return at resale than fresh interior paint. Buyers notice clean, neutral, well-kept walls, and they notice scuffed, dated ones too. A repaint before listing helps your home show better and can support a stronger offer. We explain the value angle in our article on how professional painting increases long-term value. 9. You Just Moved In Painting before you move furniture into a new home is far easier than painting around it later. A fresh coat also lets you start with colors you chose and erase the previous owner’s wear and tear. Many Orlando buyers schedule interior painting in the window between closing and move-in for exactly this reason. 10. The Sheen Looks Wrong for the Room Sometimes the issue is not the color but the finish. Flat paint in a high-traffic hallway scuffs easily, while too much gloss in a living room can highlight every imperfection. If your walls are hard to clean or show every flaw, the wrong sheen may be the culprit. Our guide to choosing between eggshell, satin, and semi-gloss can help you pick the right one this time. Ready for a Fresh Interior? If your home is showing two or three of these signs, it is probably time. A professional interior repaint is one of the most affordable ways to make your whole home feel new again. We have painted interiors across the greater Orlando area since 2018 and are licensed, insured, and bonded. Explore our interior painting services or call (321) 233-2923 for a free estimate.

10 Signs It’s Time to Repaint Your Orlando Home’s Interior Read More »

Best Paint Colors for Orlando Homes

Sherwin-Williams vs Benjamin Moore: Best for Florida Homes?

When homeowners ask us which paint brand is best for their Orlando home, the conversation almost always comes down to two names: Sherwin-Williams and Benjamin Moore. Both are premium manufacturers, both make excellent products, and both can deliver a beautiful, long-lasting finish in Florida. The real answer depends on which specific product line you choose and how it is applied. Here is an honest comparison for Florida conditions. Two Strong Brands, Different Strengths Sherwin-Williams and Benjamin Moore have competed at the top of the market for decades. The differences between their best lines are smaller than brand loyalists will admit. What matters far more than the logo on the can is choosing the right tier of product for the job and pairing it with proper surface prep. A premium paint applied over a poorly prepped surface will still fail, while a mid-tier paint applied correctly can perform beautifully. Sherwin-Williams in the Florida Climate Sherwin-Williams is a favorite among professional painters in Orlando, partly because of the density of their stores and contractor support, and partly because of their exterior lineup. For our climate, their standout products include: Duration. A thick, durable exterior acrylic with excellent moisture and mildew resistance, well suited to Florida humidity. Emerald. Their premium line, offering strong fade resistance, a smooth finish, and excellent coverage for both interior and exterior. SuperPaint. A reliable mid-tier option that balances cost and performance for homeowners who want quality without the top-tier price. Sherwin-Williams also offers elastomeric coatings that work well on Orlando stucco, flexing with the wall and bridging hairline cracks. Benjamin Moore in the Florida Climate Benjamin Moore is known for the richness of its color and the smoothness of its finish. Many designers prefer its color depth. For Florida homes, the lines worth knowing are: Aura. Their flagship line, with outstanding color retention, coverage, and durability. Aura Exterior holds color exceptionally well against UV fade. Regal Select. A high-performing option for interiors and exteriors with great washability and a forgiving application. Ben. Their entry-level premium line, a solid value choice for interior projects on a tighter budget. Benjamin Moore’s exterior products resist fading and mildew well, which are the two biggest enemies of paint in Central Florida. How They Compare on What Matters in Florida Fade Resistance Our intense UV is the number one cause of exterior paint failure. Both Emerald and Aura are engineered for strong color retention. This is more about choosing a top-tier line than choosing a brand. Avoid builder-grade and bargain paints for exterior work in Orlando, regardless of the maker. Mildew and Moisture Resistance High humidity and frequent rain make mildew resistance essential. Sherwin-Williams Duration and Emerald, and Benjamin Moore Aura, all include mildew-resistant properties. Surface prep and a proper wash matter just as much as the paint here. Coverage and Application Benjamin Moore Aura is famous for one-coat coverage on many colors, which can offset its higher price. Sherwin-Williams Emerald and Duration also cover well. For most repaints, the labor and prep are the larger cost, so paying for a paint that covers in fewer coats can be worth it. Price and Availability Pricing between comparable lines is close. Sherwin-Williams tends to win on availability for contractors because of how many locations they operate, and they run frequent sales. Benjamin Moore is sold through independent dealers, which often means strong personal service and color expertise. The Bigger Factor: Prep and Application Here is the truth that matters most. The brand on the can is far less important than the preparation underneath the paint and the skill of the person applying it. A flawless surface, the right primer, and correct application in suitable weather will outperform brand choice every time. We dig into product selection further in our guide to the longest-lasting paint for Florida’s humid climate, and finish choices in our post on choosing between eggshell, satin, and semi-gloss. Our Recommendation for Orlando Homes For exterior work in our climate, we lean toward top-tier lines from either brand, most often Sherwin-Williams Emerald or Duration, or Benjamin Moore Aura, matched to the specific surface and color. For interiors, both Regal Select and SuperPaint deliver excellent results at a sensible cost. The best choice for your home depends on your surfaces, colors, and budget, which is exactly what we help homeowners sort out. Let a Local Pro Guide Your Choice We work with both brands every week and can recommend the right product for your specific project rather than pushing one label. We have served Orlando since 2018 and are licensed, insured, and bonded. Explore our interior and exterior painting services, or call (321) 233-2923 for a free estimate and product recommendation.

Sherwin-Williams vs Benjamin Moore: Best for Florida Homes? Read More »

Repaired and painted stucco exterior on an Orlando, Florida home

How to Fix Stucco Cracks Before Painting in Florida

Stucco is one of the most common exterior surfaces in Orlando, and for good reason. It is durable, energy efficient, and well suited to our climate. But stucco also cracks, and painting over those cracks without repairing them first is one of the biggest mistakes a homeowner can make. The paint will not hide the crack for long, and worse, it can trap moisture inside your wall. Here is how to properly fix stucco cracks before painting a Florida home. Why Stucco Cracks in Florida Homes Some cracking is normal and expected. Stucco is a rigid material applied over a home that naturally shifts and settles. In Florida, several forces accelerate cracking: foundation settling, the constant expansion and contraction caused by our heat and humidity cycles, vibration, and the occasional impact from storms. Most cracks start small, but our frequent rain means even a hairline crack can channel water behind the finish, leading to bigger problems if ignored. Know Your Crack Type Not all stucco cracks are equal, and identifying the type tells you how to handle it. Hairline cracks. Thin, shallow cracks under about 1/16 inch wide. These are the most common and usually cosmetic, but they still need sealing before paint. Spider or map cracks. A web of fine cracks across an area, often from the stucco curing too quickly. Usually surface-level but worth addressing. Vertical and diagonal cracks. Often related to settling. Diagonal cracks radiating from window and door corners are common and generally manageable. Wide or stair-step cracks. Cracks wider than 1/8 inch, or cracks that follow the block joints in a stair-step pattern, can signal a structural issue. These should be evaluated before any cosmetic work. If you see wide, growing, or stair-step cracking, have it inspected before painting. Cosmetic repair will not solve a structural movement problem. Tools and Materials You Will Need For typical hairline and minor cracks, the basic supplies are a wire brush or putty knife, a caulking gun, high-quality elastomeric or paintable acrylic caulk rated for exterior use, patching compound or stucco patch for wider cracks, sandpaper, and a clean brush or hose for washing. The single most important material choice is a flexible, paintable sealant. Florida’s heat means your wall will keep moving, so a rigid filler will simply crack again. Step by Step: Repairing Stucco Cracks 1. Clean the Crack Use a wire brush or the tip of a putty knife to clear out loose debris, dust, and any flaking material from inside the crack. A clean crack lets the sealant bond properly. Rinse the area and let it dry fully before moving on. 2. Widen Hairline Cracks Slightly For very thin cracks, lightly running a tool along the crack to open it just enough gives the sealant something to grip. This sounds counterintuitive, but a slightly opened crack holds repair material far better than a tight hairline. 3. Fill the Crack For hairline and narrow cracks, apply a paintable elastomeric caulk, pushing it into the crack and tooling it smooth so it sits flush with the surface. For wider cracks, use a stucco patching compound, pressing it in and feathering the edges. Match the surrounding texture as closely as you can. 4. Texture and Smooth Florida stucco usually has a distinct texture. Blending the patch to match, whether by dabbing, sponging, or using a texture spray, is what separates an invisible repair from an obvious one. Take your time here. 5. Let It Cure Allow the sealant or patch to cure fully according to the product instructions. Painting too soon traps moisture and ruins adhesion. In our humidity, give it the full recommended time. Prime Before You Paint Repaired areas, and bare or previously unpainted stucco, should be primed with a masonry primer before the topcoat. Primer seals the surface, evens out porosity, and helps the finish coat adhere and look uniform. Skipping primer over patched areas is a common reason repairs show through the final paint. Choose the Right Paint for Stucco Once your repairs are cured and primed, the topcoat matters. Elastomeric and high-quality acrylic paints are ideal for Florida stucco because they flex with the wall and resist moisture. We explain the best products in our guide to paint that lasts longest in Florida’s humid climate. Proper prep also includes a thorough wash, which we cover in our post on pressure washing before painting. When to Call a Professional Minor cracks are within reach of a careful homeowner, but matching texture, handling large areas, and diagnosing whether a crack is cosmetic or structural takes experience. If cracks keep returning, are widening, or cover large sections of the wall, professional repair will save you money in the long run. We have repaired and painted stucco across Orlando since 2018, and we are licensed, insured, and bonded. Learn more about our exterior painting services or call (321) 233-2923 for a free inspection and estimate.

How to Fix Stucco Cracks Before Painting in Florida Read More »

Freshly painted kitchen cabinets in an Orlando home

Cabinet Painting vs Replacement: Which Is Worth It in Orlando?

Tired of your kitchen but not ready to spend tens of thousands on a full remodel? You are not alone. One of the most common questions we hear from Orlando homeowners is whether to paint their existing cabinets or replace them entirely. Both can transform a kitchen, but the cost difference is dramatic, and the right choice depends on the condition of your cabinets and your goals. Here is an honest comparison to help you decide. The Cost Difference at a Glance This is usually the deciding factor. Professionally painting kitchen cabinets in 2026 typically costs between $2,000 and $6,500, depending on the number of doors and drawers, the cabinet material, and the finish you choose. Full cabinet replacement, by contrast, commonly runs from $12,000 to $35,000 for a similar-sized kitchen once you factor in new boxes, doors, hardware, and installation. As a general rule, painting comes in 60 to 70 percent cheaper than installing new cabinets. For most Orlando homeowners whose cabinets are structurally sound, that savings is the headline. You can put the difference toward new countertops, appliances, or flooring and still come out far ahead. When Painting Your Cabinets Makes Sense Painting is the smart choice in most situations, and especially when: Your cabinet boxes and doors are solid wood or quality plywood and are not damaged You like your current layout and storage The cabinets are dated or worn in appearance but structurally fine You want a major visual change on a sensible budget You are preparing to sell and want a fresh, modern look that appeals to buyers A professional cabinet finish does more than slap on a coat of wall paint. It involves degreasing, sanding, priming, and applying a durable cabinet-grade coating that stands up to daily use and Florida humidity. Done right, painted cabinets look factory-smooth and last for years. See examples and details on our cabinet painting in Orlando page. When Replacement Is the Better Call Paint cannot fix everything. Replacement, or at least new doors and boxes, makes more sense when: The cabinet boxes are water-damaged, warped, swollen, or falling apart The cabinets are low-grade particleboard that is delaminating You want to change the layout, add cabinets, or reconfigure the kitchen There is mold or persistent moisture damage behind or under the cabinets Painting cabinets that are already failing only hides the problem temporarily. If moisture has compromised the material, no finish will hold up, and you will be spending money twice. What About Refacing? Refacing sits between the two options. It keeps your existing cabinet boxes but replaces the doors, drawer fronts, and the visible surfaces. It typically costs $900 to $6,000, more than painting but less than full replacement. Refacing can be a good middle path if your boxes are sound but the doors are damaged or you want a different door style. For most homeowners with solid cabinets and good doors, however, painting delivers the biggest visual change for the least money. Durability in the Florida Kitchen Kitchens in Orlando deal with heat and humidity on top of normal wear. That is exactly why prep and product selection matter so much with cabinet work. A rushed job that skips degreasing and priming will chip and peel within months. A professional job using the right bonding primer and cabinet enamel resists moisture, grease, and daily handling. This is not a place to cut corners or attempt a quick DIY if you want the result to last. The Return on Investment Few projects refresh a home as dramatically for the money as cabinet painting. It modernizes the single most-used room in the house and photographs beautifully for resale listings. Combined with updated hardware and a fresh wall color, painted cabinets can make a kitchen feel completely new. We cover the broader value of painting in our article on how professional painting increases long-term value. Get an Honest Recommendation The best way to decide is to have a professional look at your actual cabinets. We will tell you honestly whether painting will give you the result you want or whether your cabinets are better replaced. We have served Orlando homeowners since 2018 and are licensed, insured, and bonded. Browse our painting services or call (321) 233-2923 to schedule a free in-home estimate.

Cabinet Painting vs Replacement: Which Is Worth It in Orlando? Read More »

Florida home exterior showing fading paint that signals it is time to repaint

How Often Should You Repaint a House Exterior in Florida?

Florida is one of the toughest environments in the country for exterior paint. Between the relentless UV, daily summer storms, salt in the air, and months of high humidity, paint here simply does not last as long as it does up north. Knowing how often to repaint your home’s exterior protects your siding, prevents costly damage, and keeps your home looking its best. Here is how often Orlando homeowners should plan to repaint, broken down by the materials most common in our area. The Short Answer Most Orlando homes need an exterior repaint every 5 to 10 years. That is a shorter window than the national average, and the Florida climate is the reason. Your exact timeline depends on what your home is made of, the quality of the last paint job, the color you chose, and how much direct sun your walls take each day. A south or west-facing wall in full sun will fade and chalk faster than a shaded north side. Repaint Frequency by Siding Material Stucco Stucco is everywhere in Orlando, and a quality elastomeric or acrylic coating on stucco can last 7 to 10 years or more. The catch is that stucco develops hairline cracks as a home settles, and those cracks let moisture in. Catching and sealing them early extends the life of the finish significantly. If you are seeing cracks, read our guide on fixing common Orlando home paint problems before they spread. Wood Siding and Trim Wood is the most demanding surface in our climate. It expands and contracts with humidity and is prone to rot if moisture gets behind the paint. Wood siding and trim generally need repainting every 4 to 7 years, and the prep work matters even more than the paint itself. Fiber Cement Fiber cement, such as Hardie board, is increasingly popular on newer Orlando homes because it stands up well to moisture and pests. A good paint job on fiber cement can last 8 to 12 years, making it one of the lower-maintenance options here. Vinyl and Aluminum Painted vinyl and aluminum siding typically hold up for 5 to 10 years. Color choice is important on these surfaces, since dark colors can absorb heat and cause warping on vinyl. Signs Your Home Needs Repainting Sooner Calendars are useful, but your home will tell you when it is time. Watch for these signs: Fading or chalky residue that rubs off on your hand Cracking, flaking, or peeling paint Bubbling or blistering, which often signals trapped moisture Visible mildew, mold, or dark streaking Exposed or graying wood and stucco Caulk that has hardened, shrunk, or pulled away from seams If you notice any of these, it is worth getting an inspection rather than waiting for the calendar. Small problems caught early are far cheaper to fix than rotted siding or water intrusion. What Makes Florida Paint Wear Out Faster Three forces do most of the damage here. UV radiation breaks down the binders in paint and causes fading and chalking. Moisture and humidity feed mildew and can get behind the film, causing it to peel. Heat cycles cause constant expansion and contraction that stresses the finish. The good news is that all three can be slowed with the right products and prep. Our post on the longest-lasting paint for Florida’s climate explains what to look for. How to Make Your Exterior Paint Last Longer You can stretch the years between repaints with a few habits. Wash your exterior periodically to remove mildew and pollen before they take hold. Keep an eye on caulk and reseal gaps as they appear. Trim back landscaping that holds moisture against the walls. And when it is time to repaint, insist on thorough prep, because a clean, sound surface is what makes premium paint perform. A proper pressure wash before painting is one of the most important steps in the whole process. Plan Your Repaint With Orlando Pros If your home is approaching the five-year mark or showing any of the warning signs above, a professional inspection will tell you exactly where you stand. We have painted homes across the greater Orlando area since 2018, and we are licensed, insured, and bonded. Explore our exterior house painting services or call (321) 233-2923 for a free estimate and an honest assessment of your home’s exterior.

How Often Should You Repaint a House Exterior in Florida? Read More »

Orlando home painted in a popular 2026 exterior color for Florida houses

Best Exterior Paint Colors for Florida Homes in 2026

Choosing an exterior color in Florida is not the same as choosing one in a cooler, cloudier climate. Our intense sun, frequent rain, and high humidity change how colors read on the wall and how long they hold up. The right shade keeps your home cooler, hides the effects of pollen and mildew, and stays looking fresh for years. Here are the exterior paint colors we are recommending most to Orlando homeowners in 2026, along with the reasons they work so well here. Why Color Choice Matters More in Florida Strong UV exposure fades exterior paint faster than almost anything else, and deep, saturated colors fade fastest. Light and mid-tone colors reflect more heat, which helps keep your home cooler and reduces the strain on your air conditioning during our long summers. Lighter shades also do a better job of disguising the dust and pollen that settle on every Orlando home in spring. None of this means you are stuck with plain white. It just means the smartest Florida palettes lean toward colors that balance style with staying power. Warm Whites and Creamy Neutrals Soft, warm whites remain the most popular exterior choice in Central Florida, and for good reason. They reflect heat, pair with nearly any roof color, and read clean without looking stark. Shades with a slight warm or greige undertone avoid the cold, blue-white look that can feel harsh under our bright sun. These tones also satisfy most neighborhood standards, which matters if you live in a managed community. If you do, check our guide to HOA-approved paint colors for Orlando communities before you commit. Soft Greiges and Warm Grays Greige, the blend of gray and beige, continues to dominate in 2026 because it is so flexible. It looks current without being trendy, and it works on stucco, siding, and block. A warm gray body with crisp white trim is one of the most requested combinations we paint across Lake Nona and Hunters Creek. These mid-tones hide everyday grime better than pure white while still reflecting plenty of heat. Coastal Blues and Soft Greens For homeowners who want personality, muted coastal blues and sage greens are the standout accent and body colors of 2026. A soft blue-gray on the body with white trim gives that relaxed Florida coastal look, while sage and olive greens blend beautifully with our landscaping and palm-heavy yards. Keep these in the lighter to mid range so they resist fading. Earthy Tans and Sandstone Tones Sand, tan, and sandstone shades are a natural fit for Florida architecture, especially Mediterranean and Spanish-style stucco homes. They echo the local landscape, hide dust, and almost never clash with terracotta or tile roofs. These warm earth tones are a safe, timeless choice that holds resale value. Bold Front Doors and Accents If you love color, the smart place to use it is on the front door, shutters, or a small accent area rather than the entire body of the house. A deep navy, charcoal, or rich green door makes a statement and is easy and inexpensive to refresh in a few years when you want a change. This approach gives you personality without the fading risk that comes with a dark whole-house color. Colors to Approach With Caution Very dark and highly saturated colors, like deep reds, bright blues, and true blacks, absorb heat and fade noticeably faster in our climate. They can look stunning on day one, but they demand more frequent repainting. If you are set on a dramatic look, talk with us about premium fade-resistant products and finishes that extend the life of darker shades. Pairing Color With the Right Paint A beautiful color is only as good as the paint underneath it. In our humidity and sun, the product you choose determines how long that color survives. We break this down in our guide to the paint that lasts longest in Florida’s humid climate, and you can explore more options in our overview of the best paint colors for Orlando homes. Let Us Help You Choose and Paint Color looks different on a small swatch than it does on an entire wall in full Orlando sun. We help homeowners test samples on their actual home before committing, so there are no surprises. We have served the greater Orlando area since 2018 and are fully licensed, insured, and bonded. To get started, explore our exterior painting services or call (321) 233-2923 for a free color consultation and estimate.

Best Exterior Paint Colors for Florida Homes in 2026 Read More »